Monday, October 25, 2010

Sausage, Fennel and Cream Pasta Sauce

This pasta sauce is great for fall, it has rich sausage, the gorgeous taste of toasted fennel seeds, fresh herbs and cream.

2 Tablespoons fennel seeds
1 Tablespoon olive oil
2 Tablespoons unsalted butter
1 large onion, chopped
1 large garlic clove
1-2 carrots, chopped
2-3 celery ribs, chopped
1/2 cup flat leaf parsley, chopped
2 Tablespoons fresh sage, chopped
1 Tablespoon fresh chives, chopped
1 Tablespoon fresh rosemary, chopped
3/4 lb. hot Italian sausage
3/4 lb. mild Italian sausage
1 cup white wine
1 28 oz. can whole peeled tomatoes
1/4 cup heavy cream
salt and pepper

Heat a small pan, such as a cast iron skillet, over medium heat.  Once the pan is hot, add the fennel seeds and toast for one minute, they will almost immediately become brown and fragrant.  Stir or shake the pan while they are browning to promote even cooking.  Pour the seeds into a small dish and set aside to cool.

In a large dutch oven or similar pan, heat the oil and unsalted butter over medium heat.  Add the onion and saute until translucent and wilted, about five minutes.  Add the garlic, either using a press or finely chopped.  Reduce the heat to medium low and cook for another five minutes.  Add the carrots and celery and cook for another five minutes.  Add the herbs and saute for 1-2 minutes. 
Next, you will add the sausage.  If the sausage is in casings, remove the meat from the casings and discard the casings.  Add the sausage to the pan and increase the heat to medium.  With a wooden spoon, use an up and down motion to break apart the sausage as it browns and cooks.  This will break it up into small, crumbled pieces.  Cook the sausage until there are browned bits on the bottom of the pan and some of the sausage meat has browned and caramelized.  Depending on your stove, you may need to increase the heat to medium high to accomplish this type of browning.  Add the wine, and cook until more than half of the liquid has reduced, this will take a few minutes. 

Meanwhile, open the can of whole peeled tomatoes.  Reserving the liquid, coarsely chop the tomatoes, removing and discarding the stem portion at the top.  Once the wine has reduced, add the tomato juice, chopped tomatoes and fennel seeds.  Cover and simmer over low heat for 30 minutes.  Taste the sauce, season generously with salt and pepper.  I prefer to use sea salt and fresh ground pepper.  Add the cream and stir to thoroughly combine.

You can serve this sauce with a variety of pastas, it would be best, however, with relatively short shapes with some hollow or concave dimensions, i.e. penne, orchiette, fusili and farfalle.  These types of shapes will hold small portions of the sauce.  This sauce may be frozen and eaten at a later date!  The freezer is your friend, it is the way you can eat home cooked meals when you don't have time to make them!  I love my freezer.

Friday, October 22, 2010

Ode to Pimento Cheese

Here is a poem I wrote about pimento cheese.  For those of you that aren't familiar with pimento cheese, it is a 'salad' the way chicken salad and egg salad are 'salads,' it is shredded cheese and chopped pimentos held together with a little bit of mayonnaise, sometimes there is shredded onion added, a small amount of mustard, or some of the pimento juice added.  It is a wonderful savory snack that can be a dip, an appetizer topping, or a sandwich spread.  Hooray pimento cheese!  My sister attended an event recently where they had fried green tomatoes topped with a dollop of pimento cheese- fantastic!

Ode to Pimento Cheese
Oh, Pimento Cheese,
I used to be too scared to try you,
Until you were made for me by someone from the Bayou.
Now I enjoy your salty taste,
And sample your varieties without haste!
I have had you as a dip and as a spread,
As a tea time sandwich between two slices of bread.
As I contemplate your elegant simplicity in my mouth,
I know now why you are the pate of the South!

Wednesday, October 20, 2010

The Marvelous Mason Jar

The mason jar is surprisingly one of my most used items in the kitchen.  With my mason jars, I have made salad dressing and homemade butter.  Making salad dressing in a mason jar is incredibly easy, because you can close it and shake it to combine the ingredients, you don't have to continuously whisk and worry about separation.  To make a very simple salad dressing, combine the following in a mason jar, then shake vigorously.

2 Tablespoons vinegar (such as white balsamic)
6 Tablespoons olive oil
2 teaspoons mustard (Dijon, whole grain or without whole mustard seeds)
Optional additions:
Honey
Pepper (freshly ground)
Shallots (finely chopped)
Herbs (finely chopped)

I also like to use mason jars to store cookies and candy, like amaretti, biscotti, and candied citrus peel.  We served homemade amaretti cookies in a large mason jar during dessert of one of our dinner parties and the guests loved it.  Cookies and candies in mason jars make wonderful gifts!  You can simply leave them as is, or you can tie a ribbon around the neck of the jar.

Finally, I love mason jars because they are better than plastic food storage containers to me.  You can position the jars in the fridge more freely than some plastic containers, because you know the screw top lids won't leak- so you can put them on their side.  They are great for storing liquids like soup and coconut milk, which can sometimes be problematic with plastic containers with wide openings at the top.  I wash them in the dishwasher with all of my other dishes and I never have to worry about warping or melting, as you sometimes do with plastic containers. 

Tuesday, October 19, 2010

Chicken Pot Pie with Individual Puff Pastry Biscuits

It's finally fall, a season I absolutely love!  I love fall for many reasons.  The first is the colors, the second is the food.  I love squash and pumpkin (in most forms).  I love stews and slow cooked meats, like short ribs that are so tender they fall apart.  I love all the scents associated with Thanksgiving, you get the idea!   

I started making this chicken pot pie last year, and after some variation, I've settled on a great recipe that leaves you plenty to freeze and the way I do the puff pastry makes it possible to serve it very easily without getting sauce on top of the pastry!

For the Filling:
Olive Oil (roughly 2 Tablespoons)
1 large yellow onion, chopped
1 cup chopped fresh mushrooms (or dried mushrooms that have been soaked in warm water for 30 minutes)
3 medium carrots, chopped
3 celery ribs, chopped
2 garlic cloves
1 teaspoon dried thyme leaves
1 cup white wine or dry vermouth
2 1/2 - 3 cups stock (chicken or vegetable)
1/2 stick of butter (unsalted)
4 Tablespoons flour
2 1/2 lbs. boneless, skinless chicken breasts
salt and pepper
3/4 cup frozen peas
3/4 cup frozen corn
1/4 cup heavy cream

For the Puff Pastry
1 1/4 cups flour
salt
1 stick butter (unsalted), cut into small cubes)
ice water (roughly 3 Tablespoons)

To make the puff pastry, combine the flour and a few pinches of salt in a food processor.  I prefer to use sea salt.  Add the pieces of butter one at a time until the mixture resembles a coarse meal.  Add tablespoons of ice water, one at a time, until the dough comes together, the amount of water may vary.  Gather the dough together and wrap in saran or cling wrap, refrigerate at least one hour.

Meanwhile, heat the olive oil in a large pot over medium heat.  I use a large dutch oven for this dish.  Add the onion, mushrooms, carrots and celery, saute until wilted and some light browning has occurred.  This dish is more flavorful if you use a variety of mushrooms, not just fresh white mushrooms.  Porcini, for example, will give it a very meaty flavor.  If you are using dried mushrooms that you have soaked in warm water for 30 minutes before chopping, save that liquid and use it as your stock (or part of your stock if there isn't enough).  Mushrooms have an amazing, meaty flavor that can really add depth.  Add the garlic, either through a press or finely chopped.  Add the thyme leaves, you may also use fresh, but if you are using fresh, double the amount.  You may also add other herbs if you like, rosemary and sage, for example, would be great additions to this dish.  Saute the mixture for a few minutes once you have added the garlic and herbs, then add the wine or vermouth.  If there are any browned bits stuck to the pan, the wine or vermouth will help get them up and include them in the dish.  After most of the liquid had evaporated, add the stock, either mushroom, vegetable or chicken, or any combination of all three.  Bring to a boil, then reduce the heat to a simmer.  Add the butter and flour slowly, you may need to whisk the mixture to avoid clumping of the flour.  Adding the flour slowly and stirring will help.

The chicken may be prepared either while you are making the base of the filling or before.  Cut the chicken breasts into strip pieces roughly an inch or two wide and as long as the piece of meat.  Sprinkle with salt and pepper.  Fry at medium high heat until both sides are nicely browned.  It is alright if the inside is not totally cooked and slightly pink.  Once cooled, chop into small pieces.

The chicken may now be added to the filling, which should have a nice, slightly think gravy consistency.  If the mixture is too liquid, add a little more flour and cook for a few minutes more.  If it is too thick, add a little bit of stock.  Once you have added the chicken, you may also add the peas, corn and heavy cream.  Allow to heat thoroughly, then turn off the heat.

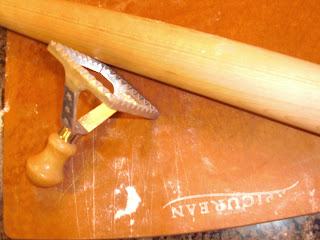
To prepare the individual puff pastry toppings, heat the oven to 425.  Prepare a baking sheet with parchment paper.  Remove the puff pastry from the refrigerator and using a rolling pin (I prefer a French pastry rolling pin, that is the kind that is all one piece and has tapered sides), roll on a floured work surface until roughly 1/4 inch thick.  Use either a ravioli die, which is what I use, or a cookie cutter or a glass to make individual 'biscuits.'  A rectangle shape is your best bet, just because it will allow you to cover the top of the dish the most efficiently.  Place the cut out 'biscuits' on the baking sheet with parchment paper.  (Optional, brush with beaten egg yolk).  Pierce the biscuits several times with the tines of a fork.  Bake for 10 minutes.

To Finish up this great, comforting dish, spoon the filling into either a casserole dish or individual dishes.  Place the 'biscuits' on the top.  Bake for 20-25 minutes at 425.  When you serve the dish, remove the 'biscuit' first, spoon the filling onto the plate, then place the puff pastry back on top.

To freeze:  Do everything but baking it at 20-25 minutes at 425.  Freeze.  When you are ready to take it our of the freezer, either defrost it in the refrigerator for one day and then follow the same directions, with possibly a few more minutes in the oven (depending on the size of the dish, etc.).  Straight out of the freezer, bake it for 45 minutes at 375.

Friday, October 15, 2010

Cookie Decorating... Not Just for Kids!

A few years ago, I had a holiday cookie decorating party for my closest girlfriends.  We drank champagne, rolled cookie dough (sugar cookies and gingerbread), dished celebrity gossip, it was hands down one of the best parties I have ever thrown or been to!  Several of the ladies brought different colored sugar, sprinkles, red hots, all the things we remember decorating cookies with when we were small!  Some of the ladies even brought sweet little aprons to wear, the kind that are only from the waist down with ruffles.  We used a variety of cookie cutters, some were seasonal and some were wacky animal shapes, like elephants and lobsters!  Lobsters are a great excuse to make an exclusively red hot decorated cookie...  And you can give them to all your New Englander friends...

Toward the end of the afternoon, one of our cookies had been given a pink bikini, and I think most of us went home for the afternoon to 'recover' from the festivities.  I haven't yet been able to repeat the party theme, but it is on my mind quite a bit, especially as the holidays approach! 
Why not throw your own cookie decorating and champagne party?  All you need to do to prepare is make the cookie dough, put some champagne on ice, and round up some fun ladies for an afternoon!  Everyone can go home with a little package of cookies.

China for All Seasons?

Before we were engaged, I had already set my heart on a particular china pattern, Woodland Spode.  I don't know exactly what it was about this pattern that I loved so immediately, whether it was the traditional feel, or the different game shown on each piece, or the tiny little bird on the inside of each delicate tea cup, but I knew instantly it was for me.  (I was amused to later find that it had been listed by a style magazine as a china you might choose if you identified with the character Bree Van de Kamp on Desperate Housewives)  To my surprise, my husband immediately agreed to this china choice, and I say to my surprise because our silver choice was a bit of 'process,' with each of us having distinctly different points of view.

We love this china, but after a few years, I had to face the reality that it was wonderful for fall and winter, but for spring and summer, it was not ideal.  After some careful discussion and research, we decided upon a second china pattern, Si Kiang by Raynaud.  It was crisp white where our Woodland Spode was creamy ivory, pink and green where our other was rich chocolate.  Instead of buying larger pieces in each of the patterns, we bought silver serving dishes to go with both.  Now, each fall and spring, I change china patterns and our table feels properly 'seasonally' dressed. 

Wednesday, October 13, 2010

The Trick to Perfect Linen Napkins

It may surprise you to know that within the last six months, I have had two very serious conversations with close friends about starched linen napkins.  The friends were lamenting how difficult it is to get a linen napkin wrinkle free and how they wished they had a better way.  Enter stage left, the starched linen napkin trick...  Wash your linen napkins as your normally would, but do not put them in the dryer.  Instead, while they are still damp from the washing machine, spray them with spray starch.  (Note: I recently purchased some scented spray starch.  While this would be wonderful for bath and bedroom linens, I would avoid it for linens you use while dining.  The scent can be a little strong and may overwhelm the lovely aroma of your dinner.)  If you are using them immediately, iron them while still damp and after you have sprayed them with spray starch.  If you are not using them right away, fold them and place in a zip lock bag and store in your freezer.  (Note: My freezer is nearly half full of napkins, runners and place mats, that's how much I believe in and use this method.)  When you are ready to prepare them for use, remove from the freezer, wait a few minutes until you are able to unfold them, and iron them as you normally would to achieve a smooth, flawless napkin.

Stay tuned, how to fold your napkins will follow!

With regard to your tablecloth, this will not work (I have tried it).  I recommend sending your tablecloths to the cleaners to be starched like men's shirts.  They will hang, somewhat folded, until you are ready to use them.  They will have some creases that will ease over time.  With a white tablecloth, I apply a bleach pen such as Tide or Clorox as spots appear.  Protect your table beneath the spot from the cleaning solution, however, with a paper towel or dish cloth. 

You are certainly also able to send your napkins to the cleaners for the same treatment.  Dinner and luncheon napkins (dinner napkins are larger), however, will most likely get folded, and the folds may not be to your liking or in places that don't work with how you'd like to present your napkins.

Tuesday, October 12, 2010

Cardamom!

I love cardamom.  It is so delicate and delicious!  A few years ago, I started to scent my sugar cubes with whole cardamom pods.  The effect is very subtle, although, when you open the sugar bowl, the scent is certainly evident.  It makes a very pleasant addition to your cup of tea, coffee, or espresso.  You could certainly do the same thing with other herbs or spices, dried lavender for example, cinnamon sticks, whole cloves, you get the idea.


Another thing I have done with cardamom lately is to use it in hot chocolate.  It is wonderful with dark, bittersweet chocolate, which is truthfully the only kind I eat!  I prefer 60% cacao bittersweet chocolate.  To make my cardamom hot chocolate, heat one part heavy cream and three parts milk, either in the microwave or on top of the stove.  After it is heated, add chocolate, I add roughly one ounce of chocolate for each cup and a half of liquid.  After the chocolate is melted, add a pinch of ground cardamom, and then use an electric wand to mix and froth the hot chocolate.  This is so good!  I had it every morning for about two months!

Monday, October 11, 2010

Welcome to Life Well Cooked!

Welcome!  In this blog, I will share recipes and entertaining tips that will make you feel like you still have an elegant life!  (Perhaps desite having had little babies...  raising hunting dogs... or just being really, really tired!)  To begin, I would like to share with you my thoughts on curly parsley.  Curly parsley might as well be wearing shoulder pads, leg warmers and a side pony tail.  When I see it, I think of the eighties when it was overused as a garnish.  I also wish beets would go away.